Sunday, February 28, 2010

Mono Printing- Fast, Furious and FUN!

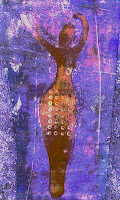
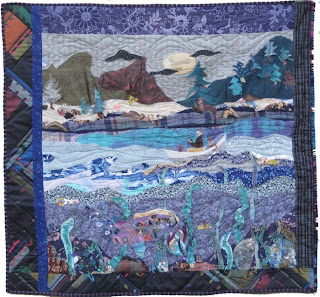
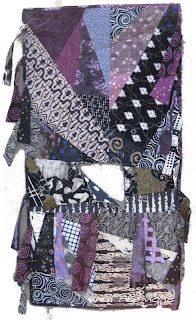
Whole cloth; painted, monoprinted, text silk-screened, oil sticks and free drawing lines with stitching. I was in a meditative place when I created this piece. When I view it, it serves as a reminder of that special moment. It allows me to remember this when in the throes of daily life. Rayon 23hx30w Traveling with SAQA 09 Fibrations until 6/10
detail Dreams Awaken
I have been working on an upcoming workshop- I usually review and improve every time I give a workshop. It also jogs one's memory. I REALLY like this process! It's a spontaneous print technique that layers fabrics visually.
A simple tag turns into a printing plate!
painted with basic acrylic paint
mono printed on top of another print
In the workshops we will experiment with several techniques to print fabrics. This method doesn't use a print press and is suitable for every level.

One of the best things about this technique is it's spontaneity, intuitiveness and ease of developing really great pieces. Right up my ally!
It will be hard to cover the sheer variety of methods, but we'll all give it a go.

Monday, February 15, 2010

Ink Aid Rocks

InkAID Just featured my work and Timothy C. Burns
I love his quote "I found myself back into art; I still find myself in art."
InkAID is a Digital Ground. 
You prepare your substrate/surface pretty much anyway you like. ( Let me count the ways!) Make sure it is flat enough to fit in your printer. Paint with inkAID and print! Two of the fiber pieces featured are Pause and Edge of NIght. They were both made using light weight molding paste. I painted light molding paste very thinly on a substrate of rayon polyester stabilizer, followed by inkAID with touches of metallic, accenting the brush stoke ridges. I used 2 coats of ink aid in each direction. InkAID comes in clear, and metallic colors. It's fun to experiment with these to create unusual effects. Try painting them on darker material and over print a photograph!


top left

Each piece was finished differently. Edge of NIght was mounted onto artist board. I thought it would be interesting to break the image into four sections on four boards. The piece sold before I retook another photo to show the depth of color.
top right
bottom left
           bottom right
I manipulated each photograph and printed with an Epson 2400 using Ultrachrome inks.

Pause can be seen on my website. It was divided it into 9 sections of 11" x14" in Photoshop. I mounted those on another substrate to compose the final piece. UV Resistant coating was painted on top.
It certainly opens your options to experiment with this product!

Thursday, February 4, 2010

Photo Shop Play

One of the things I like to do to relax is play with my photo's in Photo Shop. Here is the original image.
I overlaid the image with a photo of painted fabric. You can see tints of the color coming though.
Then I went to image> invert.
For this image, I copied and pasted in a new file, using sections of above photos. I did change the hue in the center image. Such fun!Try playing with your images. Just do it. If you're afraid of ruining your images, just make a copy first. Then see what those buttons in photo shop DO!

Wednesday, January 27, 2010

Mixed Media Fabric Techniques Workshops Announcements

Come Try Your Hand at some Mixed Media Fabric Techniques

Wen Redmond will offer 4 very unusual fabric creation workshops from her studio in Rollinsford NH. Come Explore and widen your approach to fabric printing and collage. 
2/27 Easy Image Transfer- Explore a variety of transfer techniques. We will a variety of image transfer techniques to create unique and personal images on your quilt art! Add unique and personal touches to your projects.
3/6 Gelatin Printing- An unusual approach to printmaking. We will work on small slab of gelatin to create unique and unusual fabric prints.
3/13 Mono Printing- Layer fabrics visually with spontaneous print techniques. We will experiment with several techniques to embellish your plain or painted fabrics.


3/20 Mix It Up! Mixed Media Collage Workshop Learn about various mediums, and techniques. Use up your old hard copy photos and printed papers to create a paper and cloth mixed media collage. Some image transfer and mono printing will be introduced.
Come Explore!

Saturday, January 16, 2010

Silent Affirmations

Silent Affirmations

The unseen,
the inner foundation of my soul is
the knowledge of my interior-
some open, some closed,
but continuing to go forward.
Always retuning to remember,
to look inside
my mirror,
in the water underneath
feeding that energy,
restoring the chinks 
that reality snips away.

Thursday, December 31, 2009

Basic Fabric Printing

Steps
1
Choose your image and make adjustments.
2
Set up page- file>page set up.
3
Choose your printer- you will need to do this again in printer window.
4
Choose page size of your finished print.
5
Go to file>print and printer dialogue window pops up.
6
Be sure to check fit to scale box.
7
Print and you're ready to print again.

I have been printing on fabric for a number of years now. I first just used my small document printer- a Epson 60 model. I used to use bubble jet and found it was way too much work and not that effective. I now use prepared fabrics- just Google inkjet fabrics and you will find lots with different price points. I print fabric with a Epson 2400. It works very well and the Ultrabright inks on prepared fabric is just about water proof. I tested by soaking printed fabric in a glass of water. It was fine. The printer never gives me trouble except with slippery surfaces like glossy canvas. I need to help that along by lightly pushing it into the printer as it starts to feed, taping the edges or trimming the right corner feeding edge. Just cut your fabric to size and print!
Lately I have started to experiment with Ink Aid and soon Golden's Digital Grounds. The advantages to these are the ability to print on just about anything that will fit in your printer. The thickness should be listed in your printer spec's, found on the website or manual. Mine prints to the width of a flat penny. You can make a gizz-mo that is as thick and test your substrates for fit.
Everything you do will be your teacher, just try.

Silk Organza- I simply use the regular paper setting on my Epson 2400. However, I do slightly increase the Saturation or Intensify hue in Photoshop.
This slightly increases the color, which looks a little too much while in Photoshop, but when printed on the silk organza comes out just fine. Since this action is not directed at the printer, there is no ink pooling. There is some bleed though, but that is to be expected when working with sheer materials of all kinds.
I often use the paper substrates in collage. Quilting Arts offers a DVD with that goes over my Holographic Memories technique.

Saturday, December 19, 2009

Art and Meaning

This dialogue has been around the block a few times, here and in the 'art' world. 

For me, I get excited by figuring out different ways to present my techniques and photographs. Often, without my deliberate attempts my meaning comes though. When I TRY to do this, I often fail. Creation is a dialogue between what I do when I'm art making and the response to that act. I call this being in the 'flow'. Part of my artist’s statement and my teaching is about just this thing- about letting go and dancing with the materials. When this happens the art becomes the

 meaning. The sum is more than the parts. 

Capturing Moments 2009

After that, the viewer will bring their dialogue into the 'picture'. Their interpretation becomes part
of the piece. Their meaning adds to the final result. 

Art has meaning in the act of creation and in the viewing of said art.

That said, The connection with Nature and the spiritual experiences therein are very special. The confirmation given though shared experiences always reaffirms that connection and makes one want more. So out for a walk I will go, to see the rocks smiling and to feel the trees embrace.

Wednesday, December 16, 2009

Sensing Winters Peace

Sensing Winters Peace,

Follow, into a time of rest.

Renew, and bring light

into the dark spaces.

Sing loudly.

 Peace for those with Good Will!

Happy Holidays!

Friday, November 13, 2009

Playing with Photoshop


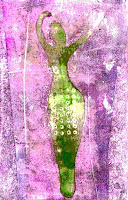
One of my favorite late night activities is playing with Photoshop. I love to messaround with my photographs, some of my work, some images of nature (my favorite subject). These are photographs of an experiment with gelatin printing. I love the texture that can be achieved with this technique. For this piece, I used a hand cut stencil of a ancient Goddess figure. In Photoshop, I used the paint bucket to add color. Just click on the tool and a selection of colors pop up. Then click on the photo and the color drops in. In Adjustments, I changed the hue using the slider. This is always fun, almost like magic. For the last image I flipped the image horizontally, so the Goddess is facing left. To do this just go to image, rotate. There are many wonderful and cool things to do with your images in photoshop. Just be sure to make a copy of your photo before you play so you don't lose it and experiment, press buttons!
 

Wednesday, November 11, 2009

Listening to Yourself

                                                           open windows 1997
How many times I hear
the soft whispering of new-
try this, or what if..
'No, no one is doing that!'
I think.
'Thats because you should do it!'
my muse smirks.
Stuffed to the Gills 1989
There have been many times when I started or tried a new technique, only to abandon it. Later, and sometimes years later- it became trendy! For example, back in the 80's I did several pieces that were totally free applique- free edge applique. I was told children love my work. This was not taken seriously. It's taken so many years and even now I find it hard to let go and let myself try unusual approaches- even in this era of free experimentation. So my artistic goal this year, well one, will be to do just that and see where it leads. GO FOR IT!
                                                               purple connections 1988

Saturday, October 31, 2009

Leaves

Wind swirls madly,
a mass of color,
challenging me to fly.
Fly like the leaves 
or just delight. 

Frosted leaves

Holographic Images-

Multi-level Surface Design/Mixed Media. Original digital image, printed twice for holographic effects. Silk noil, organza, fabrics’ hand dyed, sun printed, painted, or stamped.

38”Wx20”H 

Wednesday, October 28, 2009

Birds of a Feather


Birds of a Feather
While I love taking photographs and working them into various pieces of my art, my friend Pat Watts takes wonderful photographs of birds. And my husband is a birdwatcher. So for a gift for him, we collaborated. Pat supplied the photo and I worked it up into a holographic image, an innovative technique I am known for. ( Published in Quilting arts Magazine a couple years ago) It's an eastern phoebe.
The piece is mounted on stretcher bars to allow space for the printed silk organza to create a 3-D image. The fabric frame is painted and sun printer silk noil or raw silk. I went for a soft and sutdle effect, allowing the bird's quirky expression to come forward. I believe the gift was a success.

Friday, October 23, 2009

October Newsletter


October Newsletter Contemporary Art in Fiber
Things are happening fast this fall! When did the leaves change?
Paradise City Exhibit in Northampton Ma was a great success. What a great area.
Picture postcard of Fall in New England.
I am so excited that 2 of my pieces Roots and Tree, a silk organza collage have been juried into the Pen and Brush Gallery's Home is Where the Art Is A Fine Craft and Folk Art Exhibition.
The opening isThursday, October 29th, 4:00 pm: - 7:00pm at the Pen and Brush. between 5th Ave. and University Place Subways: L,N,Q,R,W,4, 5,6 (Union Square) Buses: M1, M3, M6

I heard from 2010 NICHE Awards competition, and my piece entitled “Pause” has been chosen as a finalist in the category of Fiber: Surface Design! This is the Rosen Shows Fine Craft Shows. They also publish American Style magazine!
Thanks to Jill Rumoshosky Werner, I have pictures of 2 of my pieces at the Wichita National All Media Craft Exhibition 2009, in Wichita Kansas, Pause and I came Singing. They are on my blog, http://fiberartgoddess.blogspot.com. It is a real pleasure to see part of the show this way. Thanks Jill.
Also, a small photo of Pause was accepted into Eye of the Quilter exhibit in Houston. This is a wonderful piece of fiber photography, a new series that I am exploring. I call it Digital Fiber.
Another piece, Trees Seen, Forest Remembered, is traveling though 2010. It is an impressive schedule.
Winter Tree and Rooted in Matter will be installed at the New Bridge on the Charles Hebrew Senior Life Center, Dedham, MA permanent collection this winter.
Please join me in Boston at the Seaport World Trade Center, for the 23rd annual Christmas Festival, Nov 6,7,and 8th, booth 534.

I am so excited and fortunate to be able to make and share my art.
Thank you all for your support!
All the Best and have a terrific Fall,
Wen

Sunday, October 18, 2009

Photo Kudo's

Thanks to Jill Rumoshosky Werner, I have pictures of 2 of my pieces at the Wichita National All Media Craft Exhibition 2009, in Wichita Kansas. It is a real pleasure to see part of the show this way. Thanks again Jill. ( Pause is large one in center.)
Also, a small photo of Pause was accepted into Eye of the Quilter exhibit in Houston. Thanks Cheryl! (from the quilt art yahoo group) for the link.
Mine is very bottom right. 

Pause was created digitally with several pictures and an overlay of painted fabric.

Friday, October 16, 2009

Creations Shared

I love it when folks send me photos of work they have done after taking a workshop with me or buying my fabric. I recently received an email with a photo of a book covered using my hand created cloth. The hand made book resembles ancient leather. 


I met him at my booth during the recent Paradise City show in Northampton MA. He graciously agreed to let me share his book with my blog readers. I invite more such creations to be published here. Thank You John!

Wednesday, October 7, 2009

Trees to Poles

Taking photos has been an interest since I first laid my hands on a camera. I have shared some from time to time. Many influence my art viva composition, pattern and design. While others become the subject of work. They can be the entire piece or added with silkscreen or collage. And now one can take photos into Photoshop and do amazing things. A new way to create in the 21st century! For this work, called Trees To Poles, I used almost all these techniques. I layered these two photos, below, in Photoshop and used them as my Holographic Image insert. I collaged additional photo elements with painted and pieced fabric.  String was embedded in the layers, which was highlighted with paint sticks afterwards. The piece was finished with stitching.

Wednesday, September 30, 2009

Begin Again

There is vitality, a life-force, a quickening that is translated through you into action. And because there is only one of you in all time, this expression is unique. If you block it, it will never exist through another medium. It will be lost. The world will not have it. It is not your business to determine how good it is…It is your business to keep it yours clearly and directly, to keep the channel open.

Martha Graham

Time alone is needed to allow thoughts to flow. Time spend making art is good. It is not wasted.


Art feeds soul. Soul feeds art.

Monday, September 21, 2009

Can't Resist?- Freezer Paper

An eazy peazy resist technique using freezer paper. Cut your freezer paper into any shape or design you want. A design hint-  Use both the positive and the negative cut out to create an easy but interesting motif.  Iron the freezer paper onto the surface of your item. 
Tape or pin your fabric, t-shirt or whatever to a printing surface. I use a table covered in a firm batting, and cloth. Then I cover that with plastic. Using a natural sponge, dab paint around the freezer paper as desired. (You could use a form brush too.) Do not saturate or it will steep under the freezer paper. Use acrylic paint or textile paint 0r they both work fine. (Another hint- if your t-shirt is light colored, slip another cloth in between front and back to catch any excess paper that might leak though. The cloth can be the start of your next project.)
Allow the paint to dry, and peel the freezer paper off.  Done! 
The paper is reusable for several more processes. You can rotate the pattern and do it again. Outline in another color using a fine tipped bottle. What ever you can think of.  Enjoy!
I usually passive set mine, allowing it to dry a couple days before washing. Textile paints will need an additional heat setting with a hot iron.
Photographs courtesy of Theresa Redmond
Related Posts Plugin for WordPress, Blogger...